Sunday, February 10, 2013

More Pimping my car!!

# 1
#2
Tools you will need:
1. Spray glue I used loc tite available at Joann's had to use that coupon!
2. Exacto knife
3. Material of your choice if you had done door panels or are going to about 2 yards seemed to do the trick you could also measure.
4. Really important waxed paper, you probably could use freezer paper but I do not know it, will work as easily as the waxed paper
5. Scissors for cutting material, around my house there are paper scissors and material do not mix them up!
6.  Glue like Liquid Nail, E -600 , something that you can squirt around the visor edges to hold the piece after you re-fold it  back to visor.
7.  clips to hold both sides together after gluing on material, since you and I do not especially own a industrial sewing machine that could sew this shut again.
8.  The flat tool like a putty knife or something a little smaller, the thing I used was some gift for attending a Tupperware Party back in the day think it was something for dealing with oranges and their peels.
funny tool
 So here is the first part you remove the visor from the vehicle.  I then used a Exacto knife to cut the thread that binds the visor together through the material and internal cardboard as can be seen in this pic # 2.   Be careful not to cut cardbard do not want to mess that up, my thread seemed somewhat dry rotted so was not a difficult task cutting it.   After removing the material flattened it out as best I could it had that foamy backing on it and was a little fragile so be careful with it you do not want to destroy your pattern.  I used a sharpy marker to trace around the old visor pattern to make the new replacement.  Since this is the rightside (side of material that is shown to world, brighter print) of the visor I also placed it on the material's right-side as seen in pic # 4
#3
#4
So using good scissors cut out your material so you can get the new look you have been so patiently waiting for.  
in #5 you see all the excess is cut away except where the mirror this is the tricky part. you need it out but do not cut out too much this can be slid under the mirror once you get it on the card board.  Make sure to mark the places around your pattern where u need to cut it to fit this is where the curves and other openings are.  Now make sure your work surface is covered with newspaper since this is spray glue and it does get in place you will probably not want it. I just sprayed the material this time instead of both pieces since we are working with cardboard and material instead of plastic.  Before you spray if your working alone get your two sheets of waxed paper ready to use, once you have sprayed your glue on the material on the wrong side ( the color or print looks faded on wrong side) get the waxed paper and place it long wise on one half of the material and then the other piece on the other half of the visor material.  I wish I had taken a picture of this step, the reason you used the waxed paper is that it will grab the card board and of course it will be where you do not want it to be, then you will swear a blue streak....and your day will go down hill from there and you still have one more visor to to finish.   So here is were you take one of the sheets of waxed paper off, eye ball where you want to place the visor right side out on the glue sprayed piece of material, then lay it down gently and then flip it over ( you may want to have the material down and then lay the visor on top it is what your comfort level is.  You now need to smooth out wrinkles and make sure your curves are going to the inside of the visor.  When you are ready you can remove other sheet of paper and smooth the other side out also using the tool and possibly the Exacto to get the material under the vanity mirror on the other half of the visor.  During this process you must also put the excess material to the inside of the visor so you have a nice finished edge no cardboard showing
#6

#5
 Now after you have gotten
all the material smoothed out you want to get the tube glue out and go along the inside edge of the visor, use a medium size bead of glue because this is all that is going to hold that visor together unless again you have an industrial sewing machine laying around and have nothing else to do.  After Glue is applied get you clamps or clothespins and go all along the edge like in pic # 7  and # 8 let this dry for about an hour or two according to how well your weather is working for you.   Then remove the clamps and hang your new beautiful new visor in your car.  Now time to get to work on the other one.
#7
#8

 I am sure it is as sad as the first, this one will be easier since you have done one already.    I worked the passenger side first in case I ran out of time or whatever.  I do love showing off my visors and door panels to anyone who will look it has energized me and my car!!   I smile every time now that I get in the next project is getting it painted. same color but just new paint. Have fun Pimping your car!! I hope you enjoy doing your visors as much as I did.
#9


Saturday, January 12, 2013

New Door Panels Whoot!!!


I have been wanting to do this project for so long , this and that got in the way then the weather got cold and then it got rainy, and today it is beautiful the weather man says it is in the up 70's I beg to differ it is hot out there, but I got the job done today.  They look absolutely gorgeous, my next attempt to pimp my ride is going to be doing the visors.  Pinterest is the most wonderful thing in the universe.  That may be a little out there (universe-world) whatever, but to be able to find out people are doing things you would not have thought about doing just makes me smile.   So today I decided to tackle this job of getting rid of my ugly vinyl door panels and creating these new paisley printed ones here are some of my steps.  My original inspiration came from buildersforeternity.blogspot.com, she had done her Escape with ripple stripe material that matched her also beige interior, as soon as I saw her car I went straight to Joanns and bought my paisley material.  Her truck is red my is a royal blue love the thing had it since late 2001 so it is called a 2002. At this moment have technical difficulties the phone sd card is going me a fit thought it would be easier to just put that in and get the pics off it but no it has decided it is going to not respond!! gota love technology you can live with it or with out it.  Had to live without my phone the other day left it at work and drove about a mile away and said to heck with it and it left it till next morning when I got back to work, needed to make a call during the evening and had to use my husbands phone we did away with land lines along time ago we free sort of still have to pay ATT for dsl....gees trying to get the pics is getting frustrating maybe will go steal them off my facebook page and bring them back here!! hahahaha, well went out to face book to get them since the phone is being a pain,,,anyway just love them can't wait to the the visors next.   Was going ot put pic at how it looked before but since I did not send that to FB it will have to wait till the sd decides to get its act together.  Finally got it to load so I could get all the pics off from this job...yeah they are all here and I am so proud of the job I did I can't wait to  tackle the back doors but got to go get more spray adhesive. Will post when get visors done too...cya. Here is the other girl that gave me inspriation Little miss Southern Charm

Sunday, November 11, 2012

New Christmas Card for this year!


Like most people who have a blog I am not the prolific writer like they are .  I have a job and have not small children, I have 5 dogs who keep us somewhat busy, I try and do my craft things on the week-end since that is the only real spare time I have I could work on something every night, but that is not how I work I found an idea for this years cards for Christmas at Scallop Tree With Dawn.   After seeing her cute tree I new I was going to have to make some for this year.  I used to buy cards all the time and rarely got them mailed now that I have been making my own they get mailed I am up to making only 30 cards, but there are some days when that is more than enough.  This year followed her basic instructions, but created my own scallop on my cricut by using SCAL, made the tree shape she had suggested and just had an absolute ball making them, labor intense ,but that is the way I work... Made the last few unfortunately using a cute printed paper I had left over from my daughters advent tree I had made her for a friend's new baby, only made 8 of them last year but one more this year oh well...anyway her are the pictures of the tree cut out in printed paper think it looks adorable no need to decorate. The first ones I made were just the green as Dawn had suggested, did some decorating using  acrylic paint and Stickles in red, this one did not have the white acrylic on it to make it look like snow was on it ...but you get the idea. They were really fun now get to decorate the envelopes so the look just as Christmasy, also need to add a sentiment to inside have to come up with that yet.  Have fun hope you enjoy the cards.

Thursday, August 16, 2012

Baking with Cyn STROMBOLI the easy way

Came home from work the other day you know how that goes husband and I usually play the what do want to eat while I am driving home.  The I do not know what do you want thing some times it drives me crazy and that on most days is a short trip.  Anyway we we talking about making our Stromboli, had made one about a week or so ago and it was the bomb!  In a Good way so good but it could be better, we had in the past used Martha White Pizza crust, it was inexpensive and kept in it bags till we added the liquids, it served it purpose, it worked and we liked it because we had nothing else to compare it to for convenience except getting pizza via a real restaurant or take out.  So one day staring at the biscuit cooler at the store noticed the pizza crust in a can, thought lets give this a shot.  It was a little more expensive but if it worked I was for it, it was Great Value, took it home and then one night we decided to go for it and it was not a bad Stromboli, but we thought we could do better.  So this night in particular, husband decided he wanted another one of those sorry Stromboli's we had made a week ago.  (sorry in our house is a relative term it could be bad or jokingly good) I knew he meant good so we had purchased at the store the last visit a pizza dough in the can by Pillsbury a little more expensive by about $1.00 but GV was not to be seen think Walmart is either getting new designs for their stuff or doing away, this is another story.  So get the new improved Pillsbury pizza crust out and fill the cookie sheet all 9 x 13 worth of it after cooking our Italian sausage onions, garlic and mushrooms with oregano in it, threw some mozzarella cheese on first then added the meats and vegetables, then of course more cheese and then into the (all depends on your oven) 400 degree oven for approx. 9 minutes.  We had also light coated the top of the Stromboli with olive oil and garlic powder, no vamps in our house, even though True Blood and debunked the garlic and mirror thing, and they said everything on the internet is true!  Anyway too it out of the oven and sliced it in to sections with my handy dandy pizza cutter and to our surprise it was better by far than the first. 
The recipe so that it is
1 Can of pillsbury pizza crust
2 links of Johnson-ville sweet Italian sausage
1 onion
3 cloves of garlic minced
a good sprinkle of oregano
almost a whole 2 cup bag of mozzarella cheese.
cook all the raw stuff except cheese and crust till done put pizza crust on the cookie sheet oven should be already on 400 degrees.
Sprinkle about half the bag of cheese as a base and then put the other ingredients on top , then add one more layer of cheese (you would not believe we like mozzarella so much) and then fold over the crust to make a pouch or Stromboli what ever you need to explain this pinch the edges and bake.  Did not plain on exploiting my Stromboli so did not take step by step pics (this was a spur of the moment with husbands phone) I am sure we will have it again soon so those of you who need them ( I doubt many of you do but we do have virgins out there ) and they will will post them then.  As you can see a bite or tow was already out of it when realized need to post this wonderful meal on the web. Hope you try it and enjoy it as much as we did. 

Saturday, June 9, 2012

Okay Camisole Wearers unite!! HAHAHAHA

Get it they are united on one hanger...This may not be the most earth shattering thing to come up with but right this sec think it is the bomb, until one of you ladies out there on the web can give me a better Idea I am going to go with this.  I was tired of trying to find a camisole to go with whatever outfit I wanted to wear and was tired of looking for it on the last shirt I wore it with.  So fond these cute shower curtain rings at the thrift store of course and they were so colorful looked like candy drops, thought they would be a great way to hang them some way.  Of course tried them just on a hanger and they all slid to the one end then grabbed this old wooden pants hanger and put all them on it and snapped it shut and it held them in place now it is hanging in my closet all sorted and easier to find than before.....got room for a couple of more should be at least 12 of them there hooks wise not camisoles, going to probably bend them a little more so they will not slip off hanger, but for now they are okay the way they are.  Short an  sweet going to go start re-fashioning some more Hawaiian shirts got today.    This time will try and do a step by step tutorial on another V-neck one, the other was so comfortable that I made last week-end.

Friday, June 1, 2012

Doodle or Zentangle what ever you want to call it


Took a class we called Zentangle/doodling think the Z  name is probably copyrighted and can only be used by an official CTZ teacher. The class was at our local scrapbook shop and had a great time, since then I have spent at least 3 nights or more a week doodling or Z-ing a couple of hours each night. Usually working on an 8x11 pad of paper, using Microns or Faber Castell PITT Artist pens in black all different nibs, working on a ceramics piece was a new challenge.  I have been wanting to do  for awhile seen several pics on of a similar idea of this on a ceramic piece on Pinterest of course. So found this soap dispenser at the Dollar Store it cost a $1.00!! Thought about a plate a bowl and nothing spoke to me as something I really needed, not that I needed the soap dispenser, but it was probably the most useful thing I could think of that the black on white would work well, had seen the white Mustang some guy had done with regular sharpies looked really cool, but  first I did not have 30 thousand to chunk down on a car and did not want to devote 80 hours to drawing on the car.   It took about hour and half,  was trying to think of what to do on it as I went and working on a sealed surface makes the product dry a slow so I thought it really drying quicker than I thought.  It is an oil base pen marker from Sharpie who would have thunk!  So here the piece  both sides excuse the sun spot took it with my cell phone.  The dispenser is completely covered all around except the bottom had fun may do another, but get some colored ones for next adventure.  Think a dash of yellow maybe a sun with flairs coming off of it, boy that opens another can of worms.  Better than fishing!!

Monday, May 28, 2012

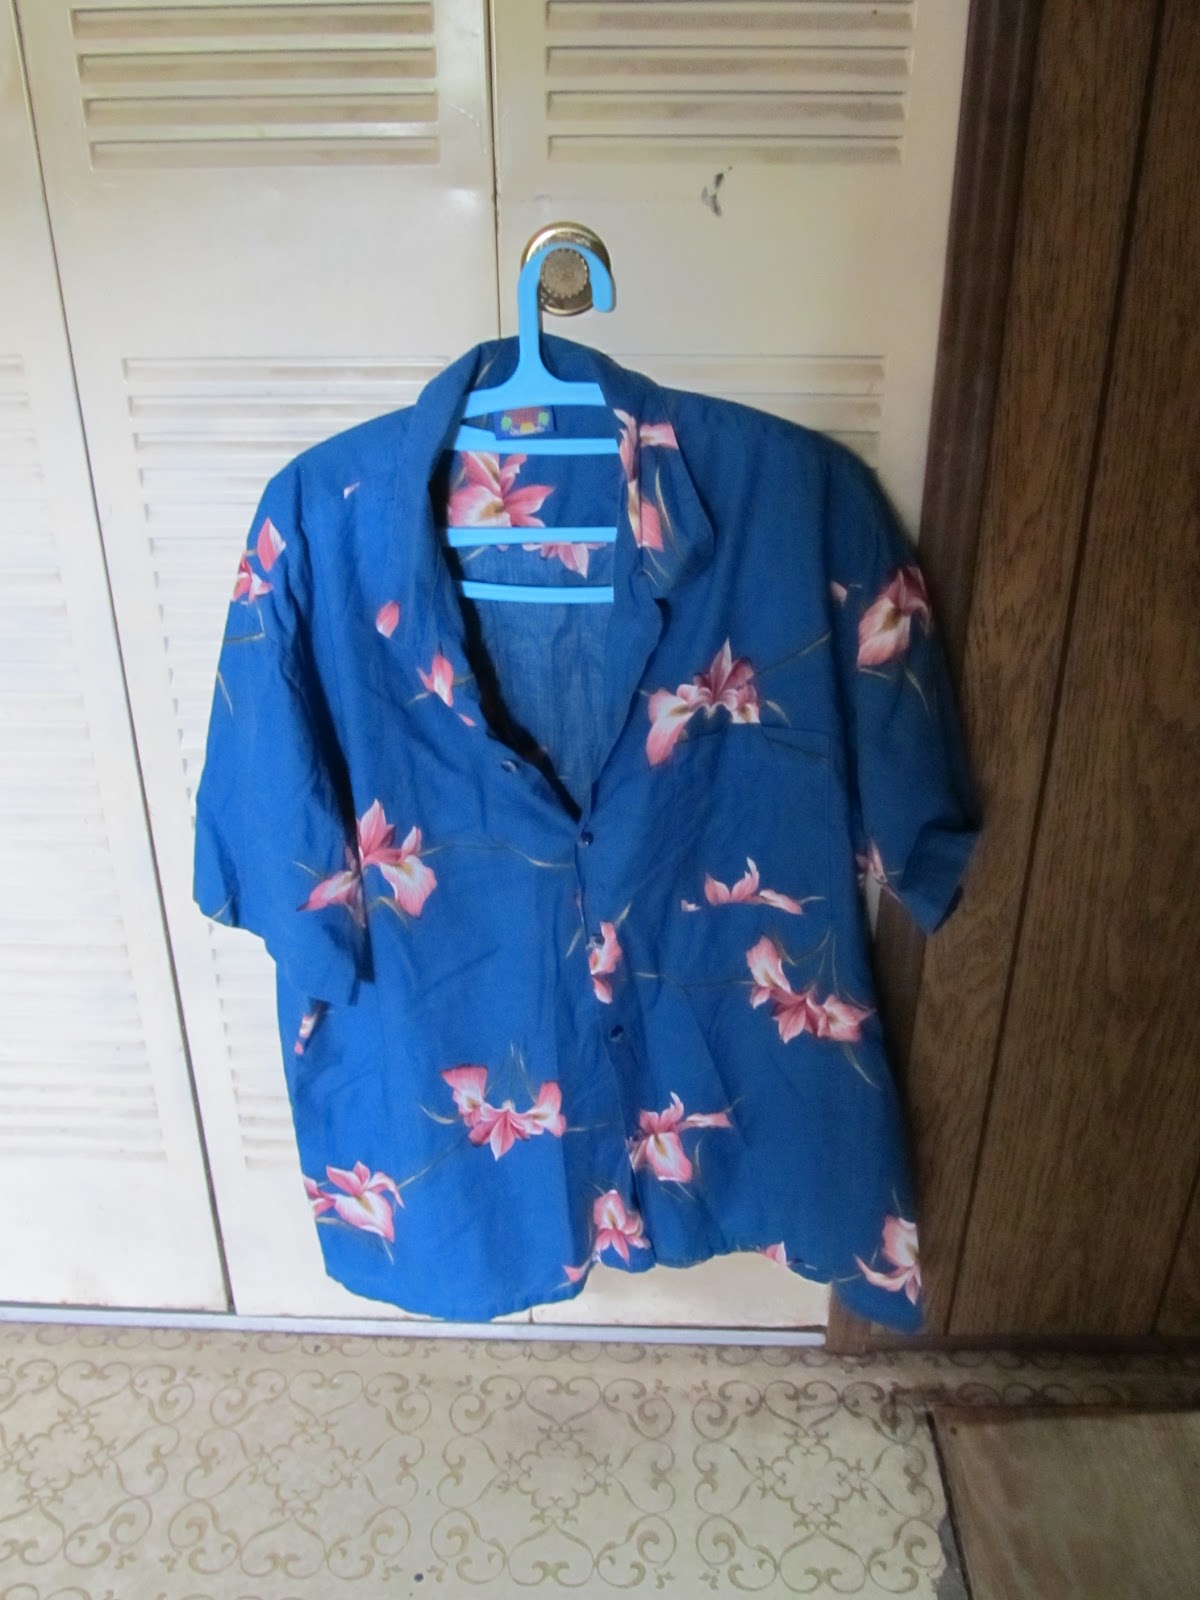
I guess on a blogging roll again, just finished another shirt a few ago, this time re-fashioned Hawaiian shirt.  Hawaiian shirts are sort of a uniform at our office the docs wear them everyday. the owner doc is a big surfer so can see why he wears them reminds him of the smell of surfboard wax, but that is a smell hard to forget especially when he can pretty much hit the surf at least one time a day.  Also got this at my fav thrift store thought it was a little feminine for a guy so grabbed it right up thought it would look good with khaki shorts.  So I went to destructing this garment.  First I cut off the sleeves already had in mind to make it a sleeveless model.  Hemmed the arm holes about 1/4 inch, after trying it on again decided needed to take up the pits a bit, so took about 1 1/2 in from bottom of the opening to the side seem at angle about 4 inches.

Thought about shirring under the bust to make it have a little more shape so put it on a safety pinned it just under the breast and it looked pretty cute but then started thinking where I usually get into trouble it was going to take up too much material and then it would look snug.  So went to plan "B" I made a tuck or pleat under each breast to give more shape but not take up a lot of the material.  After getting that negotiated measured down from center of shoulder about 15 inches approx measurement of safety pin, then over 7 inches from the side seam this made a center point.  From here I drew a straight line across the shirt approx 3 inches long from the center point of that line marked 1 1/2 inches from there left and then right too give me my fold in point, folded it from the  outside edge to the center line going up and down did the same for the other side of this pleat.  Did same measurements for the other side to make a matching pleat.  Pinned both pleats with straight pins then biased the area to get a fit.  Looked pretty good for first go around.  Also stitched the front of the shirt closed the girls have a habit of trying to expand their horizons and would rather they stay supervised.  Just hate it when button shirts gap that has drove me crazy most of my life.  So now it is a very short trip I do not plan to take in near future. Now back to the shirt and leaving mental health to another day....decided it was a bit too long you know how  Stacy and Clinton are always telling you long shirts make you look shorter well took approx 5 inches off split the sides and opened them up then hemmed the whole thing just made it that more comfortable.
Love the pleats short sleeves and so summery looking can't wait to wear it to work tomorrow...cya