Monday, April 28, 2014

Been A long While

      Do you ever get that thought when your scrap booking I need a particular look for the base paper.  I was in that dark place where no matter where I looked nothing was rolling my socks up and down.  No amount of wine cooler was going to do it either. So instead of scrapping I let it sit , what I wanted to work on was my trip in January to NEW YORK!! For my Christmas surprise my daughters had booked the three of us a trip plus accommodations to New York we at 40th and 5th Ave. Right in the heart of the city!!  And how they pulled this off is Christmas day we at my oldest daughters house everyone had opened up their presents, I was last to get mine it was a basket with small travel size products and I asked is my breath bad, do I need deodorant?  They laughed and said no, the oldest one ran back to another room and appeared with the board with the  $ 20,000 Holiday Game. So I am thinking what are we doing, my youngest one started giving me the clues, have not seen this game on TV in like forever so was a little rusty, first question she askes is "Things to do with the  girls?"
So I'm doing the bachelorette party ,  shower, baby bridal , the answers was girls night out then the final clues were, Empire State Building , Statue of Liberty, Times Square and about that time I started to cry and said things you see in NEW YORK!!! Which of course was brilliant and correct.  They had planned the trip since June for my birthday which is in January it was a big one hit one of the Something OHHHS.   So we got to go on January the 22nd. took tons of pictures, and was coming up with nothing cool to scrap them on tired of doing the color paper with the coordinating color behind it...blah blah blah....So long (Extremely) long story to get to here could not find anything for the Statue of Liberty or Ellis Island which we were so grateful to be able to go on.   Went to Jo-Anns struck out  went to one of  local shops which is just about the only one here and got 4 sheets of paper for another trip I wanted to scrap, ended up at Hobby lobby bought a pile of paper but still nothing for the NEW YORK trip.   So Sat here thinking I knew what I wanted just could not buy it so, decided to surf the web for pics of immigrants from back in the day the great migration from there country of origin to the  great New York, long voyage and enduring the tight quarters to come to this free land.  Found one that I thought would be great ,went to this website that sets up you pics so you can  print them poster size you just have to stick them together.  Not a big problem when you scrap book you have adhesives out the  whaaazooo!! Here is the link it is called block posters, the pic I used was nto the best of quality and looked a little pixelated but not that important it made the paper I wanted and could not buy.  After you load up the picture from your files you it  shows you how it will it will be  printed on how many pages , you can change the orientation of the paper from portrait to landscape and it show you in real time how many pieces it will take to print it and how  big it will be.   
One of my other pages needed a back
round for was Wall Street so found a picture of big bills, after you upload teh pic you want as back round it go to Slice your image, this is where you do the landscape paper or the portrait and hit letter size and you see the lines showing how it will print., them it makes a pdf for you to print usually about 12 pages , it will be approx. 2.9 x 2.2 inches big enough to make 2 12x 12 pieces. 
So here is what I did had to take pictures of money so I could get a better picture to poster size. (maybe not a word but you get it)  they think the more pixalization the better but not in all cases.  Anyway laid out some cash on a piece of canvas had laying in my scrap room took a couple of shots and then came into print.  You need to keep the photos under 1 mg ir will not load on the site if too big.  So of course had to crop it down ended up with 886 kg which was fine.  Then went to the website to create my new back round page.
So here is the pic will not let me upload the poster version which is a pdf this time I paid more attention to the pages and saw I did not want to print page 9-12 those were tiny edges which were not important to the overall page.  So with them printed will go back and put them together. This is the fun part a giant puzzle with nothing to really look at but the pic you took so I did that, also marked the edges I did not want to keep.  Starting on the left row one called the 1st one 1 a then the next page marked the left side margin with X that meant cut off so go through, marking the side your keeping and the one that is going you need 1 margin in between each piece so there is something to attach the next page too.  At the end the outside edge is going to be gone so mark that with X also you need to trim before you glue or tape them together.  After you get them laid out the way you want, start removing the edges and tape or glue away.

This picture is the back of those 8 pages hooked together I am now going to cut my pages I need so flipped it over to work form the back used a piece of 12 x 12 to trace only need to do 2 sides.  Then took my exacto knife and but along the line of the tow sides and cut away then used my large machete cutter and cut the other 2 sides and I was done. 12 x 12 custom paper for my needs!!! Got the finished pages loaded so you can see how the paper work I think it looks great.  Hope you enjoy the new idea I may have given you , has gotten my brain whirling for more pages to create.


Saturday, July 27, 2013

Legos and Crochet!

Inkscape pattern idea
 About a month ago I saw someone on Pinterest had crated a Lego Afghan., it was really cute but I knew I could either find the  pattern or  dope it out  one way shape form...finally found this  pattern from  from Eva Ferrebee the Lego Block.   I new this would make a great afghan for my youngest daughter she is now married and was my Lego kid..I still have her 5 gallon bucket full of them base and all.  I started out with the measurement of the  block it is approximately 3" x 5"  I had laid it out in Inkscape, place using the block colors of red, yellow, blue, black and white. This let me lay out the pattern of the colors so I could see how it would look in the end.  After I figured out a what size of  afghan I began to figure how many blocks of each color.  It ended up at first 50 blocks 10 of each then I ended up making more another 50.
Started working got the blocks set up in rows in the color sequence started sewing the rows together with the paddy green.  Used the crochet stitch for joining that creates a ridge on top of the blocks as you can see in the pictures.  I would attach two rows then attach those two to the next two thought that would make it more manageable to work with.  The entire project took over a month and half.. Could not wait to finish it.  Thinking back I wish I had done the squares in groups of 10 wide by 5 rows, those I would have blocked and bordered it in the green also but it may have been easier to work on.  Less cumbersome not quite a mile a minute which that may have been easy too, long strips edged with the green and then stitched together and swa- la done deal.  

.
Can't measure it now daughter came down and took it home got one more thing off my work table.  Will tackle another project soon moving back to my car project....got new window switch going to let you know how that went. cya then.


Pinterest Hack Not Really

Someone  had posted out  there this cute idea for a  scarf hanger.  This whole thing was made from 2 7 hook wall hangers and the flat black velvet like hanger the main info is posted on Dollar Store's website 
It is a great idea but we have no Dollar Stores here they have all turned into Dollar Tree, not the same.....have looked in at least 3 and not seen a single wall hook hanger,.  Well anyway we went Thrift store shopping like every Saturday and we ended up at a flea market we have not been to in a while.  Found a booth with their version of Dollar Store this box a $ and up is more like it but  I at leas found some hooks that can hang.  The were over the door.  They are a little larger and have 6 hooks still used the zip ties to secure them to my hanger I already had and for $2.00 I created my own camisole hanger those things take up way to much room.
 The only thing I had to do was to cut the over the door hanging part off they were over the last hook on each end.  Used my small bolt cutters for that you would never believe how handy those suckers come in.  I used them last week to cut down a piece of that wire closet shelving stuff you get at home depot, or me got at the thrift store fore less and $3.00 for 2 pieces one of which got cut down last week to make a new earring hanger....will post that in a few.  Anyway back to this project,

 Had the hanger and 3 zip ties one on either end taking in both hangers and the main hanger the one in the center to make sure this was secure for hanging the camisoles which you see below I have room for  more on back will amend that after getting it back in closet. One hanger and 12 camisoles could double up the hooks but for now this works for me hopefully it will work for you.

Sunday, July 14, 2013

Monday, May 20, 2013

So easy and it is crazy good!!

You ever get in the mood for  breakfast but at dinner time, well since our kids are grow and out of the house we cook what we want anytime  We did cook what we wanted when they were young now they pretty much eat anything, not afraid of new or different.  We are big on mushrooms, onions and garlic,.  No Vamps living in my neighborhood, we pretty much IV it around here if it is not minced it is powdered or salt.  Well as usual I have digressed from the wonderful upgraded at least for us Week-End Biscuit Egg Casserole, I found it on pinterest of course and it has been eaten here 2 times already.  We will now let you know our version if you are an  onion, garlic and mushroom kinda eater, you will enjoy this spin on it.  If not that is okay too that is why it is called a recipe and you do with it as you will to suit yourself.
The recipe is as follows with my additions and changes,
1st we did use the grands biscuits from the can
mashed them into the 8x8, but tonight we used a 10 x 8 pan because the first time we made it, it looked like it was going to come on out.  Well this pan worked well so this will be the pan of the future.
next we not only used turkey sausage (Jimmy Dean cooked and crumbled)  best sausage flavor yet in a sausage made from the bird...  Had Jenny O one time and the that was it not enough spice sort of bland.
! medium onion chopped and a small can of mushrooms chopped while I was browning the onion, also lest we forget the garlic 1 tablespoon of minced, we cheated tonight and used the kind in the jar.  Anyway still no vamps in my neighborhood.   We used 5 eggs beaten with 1/4 milk
preheat oven to 425 egress and set timer for 30 minutes
1. biscuits mashed in to bottom of pan no seams allowed which is really hard to do just like any refrigerator biscuit there is some special thing about them that makes them not join together in a seamless manner.
2. sausage 1 lb cooked crumbled and cooled (since mine comes from freezer usually heat it a bit so not to slow down biscuit rising part
3.  Cooked med onion and small can mushrooms with garlic (what amount you like or not) thrown in for good measure...
4  5 eggs with  1/4 cup milk scrambled

Assembly biscuits in bottom, sausage mixture of onions, garlic, mushrooms, then pour eggs over all this.  According to the original recipe Lindsay had used 1 cup of Mozzarella and 1 cup cheddar which we do not not big on cheeses breakfast or with biscuits.  BUT WE DO LOVE SAUSAGE GRAVY.......Not the kind that takes time to make but Pioneer in a bag from the mix area of the grocery store 2 cups of water them mix and your cooking like Hardies but without having to get in your car and drive over.    After baking let it stand for 5 minutes this lets the eggs firm up and gets everything to meld.  Cut it into what  I call biscuit size chunks and devour.  Gravy of course spooned over and you get that rib sticking morning thing or that evening dinner thing that makes you glad you have an oven.

Sunday, May 12, 2013

Hells Bells and other annoying things!!

Days like today is when TECHNOLOGY SUCKS!  I am sitting here with a phone that works but will not send mesages or phone calls because some how the service provider has screwed up my automated payment on my phone and i have no FUNDS to do anything with.  Will have to wait till my husbnd comes home to use his phone so they can do something to fix the problem and active the phone how do they do theat when u are a new subscriber and u have the only phone on the plan sounds like someone can not figure out where the on button is!!  I have approximately 27 messages from them telling me I have no funds, but yet they can waste my non funds on sending me messages!! I do not understand. It all started when my voice recognition went on the fritz end of the week  earlier that week had sent a photo or rather tried to when we received a new camera for our endoscope and it was a neon green thank god horses are color blind or they would need sunglasses to look a this thing anyway went to send it noticed a red circle on it with an x and low and behold the thing did not send so that is when it started but did not  know what to make of it...The worst thing about not having service is that if I was out and about and did not know this had happened I would be virtually stranded.  That sounds a little scary to me at this point.  Sometime when I am working I must go out and meet docs somewhere out range is pretty large and I could have to go miles like 30-40 to met them to bring out piece of equipment, since a lot of times I use the GPS and it is great but what if it went out when I was out there and had no idea of where to go from wherever....not a position I want to be in.  I have reactivated it 4 times today 2 times earlier and just a few ago....and still no phone.  I ask what did we do before we came so dependent on these little wonders who when they work are so wonder ful and fun but when they do not u wish you had never seen them in you life.  Oh well my husband should be home soon so WE can get with THEM and get this issue squared away.    Wil be back soon working on some rain boots dying to get started on and see what comes of the designs I have in mind for them....nothing to do with pray glue or fabric.....hint though they are now red all over sort of like the newspaper but in color......

Sunday, February 10, 2013

More Pimping my car!!

# 1
#2
Tools you will need:
1. Spray glue I used loc tite available at Joann's had to use that coupon!
2. Exacto knife
3. Material of your choice if you had done door panels or are going to about 2 yards seemed to do the trick you could also measure.
4. Really important waxed paper, you probably could use freezer paper but I do not know it, will work as easily as the waxed paper
5. Scissors for cutting material, around my house there are paper scissors and material do not mix them up!
6.  Glue like Liquid Nail, E -600 , something that you can squirt around the visor edges to hold the piece after you re-fold it  back to visor.
7.  clips to hold both sides together after gluing on material, since you and I do not especially own a industrial sewing machine that could sew this shut again.
8.  The flat tool like a putty knife or something a little smaller, the thing I used was some gift for attending a Tupperware Party back in the day think it was something for dealing with oranges and their peels.
funny tool
 So here is the first part you remove the visor from the vehicle.  I then used a Exacto knife to cut the thread that binds the visor together through the material and internal cardboard as can be seen in this pic # 2.   Be careful not to cut cardbard do not want to mess that up, my thread seemed somewhat dry rotted so was not a difficult task cutting it.   After removing the material flattened it out as best I could it had that foamy backing on it and was a little fragile so be careful with it you do not want to destroy your pattern.  I used a sharpy marker to trace around the old visor pattern to make the new replacement.  Since this is the rightside (side of material that is shown to world, brighter print) of the visor I also placed it on the material's right-side as seen in pic # 4
#3
#4
So using good scissors cut out your material so you can get the new look you have been so patiently waiting for.  
in #5 you see all the excess is cut away except where the mirror this is the tricky part. you need it out but do not cut out too much this can be slid under the mirror once you get it on the card board.  Make sure to mark the places around your pattern where u need to cut it to fit this is where the curves and other openings are.  Now make sure your work surface is covered with newspaper since this is spray glue and it does get in place you will probably not want it. I just sprayed the material this time instead of both pieces since we are working with cardboard and material instead of plastic.  Before you spray if your working alone get your two sheets of waxed paper ready to use, once you have sprayed your glue on the material on the wrong side ( the color or print looks faded on wrong side) get the waxed paper and place it long wise on one half of the material and then the other piece on the other half of the visor material.  I wish I had taken a picture of this step, the reason you used the waxed paper is that it will grab the card board and of course it will be where you do not want it to be, then you will swear a blue streak....and your day will go down hill from there and you still have one more visor to to finish.   So here is were you take one of the sheets of waxed paper off, eye ball where you want to place the visor right side out on the glue sprayed piece of material, then lay it down gently and then flip it over ( you may want to have the material down and then lay the visor on top it is what your comfort level is.  You now need to smooth out wrinkles and make sure your curves are going to the inside of the visor.  When you are ready you can remove other sheet of paper and smooth the other side out also using the tool and possibly the Exacto to get the material under the vanity mirror on the other half of the visor.  During this process you must also put the excess material to the inside of the visor so you have a nice finished edge no cardboard showing
#6

#5
 Now after you have gotten
all the material smoothed out you want to get the tube glue out and go along the inside edge of the visor, use a medium size bead of glue because this is all that is going to hold that visor together unless again you have an industrial sewing machine laying around and have nothing else to do.  After Glue is applied get you clamps or clothespins and go all along the edge like in pic # 7  and # 8 let this dry for about an hour or two according to how well your weather is working for you.   Then remove the clamps and hang your new beautiful new visor in your car.  Now time to get to work on the other one.
#7
#8

 I am sure it is as sad as the first, this one will be easier since you have done one already.    I worked the passenger side first in case I ran out of time or whatever.  I do love showing off my visors and door panels to anyone who will look it has energized me and my car!!   I smile every time now that I get in the next project is getting it painted. same color but just new paint. Have fun Pimping your car!! I hope you enjoy doing your visors as much as I did.
#9


Saturday, January 12, 2013

New Door Panels Whoot!!!


I have been wanting to do this project for so long , this and that got in the way then the weather got cold and then it got rainy, and today it is beautiful the weather man says it is in the up 70's I beg to differ it is hot out there, but I got the job done today.  They look absolutely gorgeous, my next attempt to pimp my ride is going to be doing the visors.  Pinterest is the most wonderful thing in the universe.  That may be a little out there (universe-world) whatever, but to be able to find out people are doing things you would not have thought about doing just makes me smile.   So today I decided to tackle this job of getting rid of my ugly vinyl door panels and creating these new paisley printed ones here are some of my steps.  My original inspiration came from buildersforeternity.blogspot.com, she had done her Escape with ripple stripe material that matched her also beige interior, as soon as I saw her car I went straight to Joanns and bought my paisley material.  Her truck is red my is a royal blue love the thing had it since late 2001 so it is called a 2002. At this moment have technical difficulties the phone sd card is going me a fit thought it would be easier to just put that in and get the pics off it but no it has decided it is going to not respond!! gota love technology you can live with it or with out it.  Had to live without my phone the other day left it at work and drove about a mile away and said to heck with it and it left it till next morning when I got back to work, needed to make a call during the evening and had to use my husbands phone we did away with land lines along time ago we free sort of still have to pay ATT for dsl....gees trying to get the pics is getting frustrating maybe will go steal them off my facebook page and bring them back here!! hahahaha, well went out to face book to get them since the phone is being a pain,,,anyway just love them can't wait to the the visors next.   Was going ot put pic at how it looked before but since I did not send that to FB it will have to wait till the sd decides to get its act together.  Finally got it to load so I could get all the pics off from this job...yeah they are all here and I am so proud of the job I did I can't wait to  tackle the back doors but got to go get more spray adhesive. Will post when get visors done too...cya. Here is the other girl that gave me inspriation Little miss Southern Charm

Sunday, November 11, 2012

New Christmas Card for this year!


Like most people who have a blog I am not the prolific writer like they are .  I have a job and have not small children, I have 5 dogs who keep us somewhat busy, I try and do my craft things on the week-end since that is the only real spare time I have I could work on something every night, but that is not how I work I found an idea for this years cards for Christmas at Scallop Tree With Dawn.   After seeing her cute tree I new I was going to have to make some for this year.  I used to buy cards all the time and rarely got them mailed now that I have been making my own they get mailed I am up to making only 30 cards, but there are some days when that is more than enough.  This year followed her basic instructions, but created my own scallop on my cricut by using SCAL, made the tree shape she had suggested and just had an absolute ball making them, labor intense ,but that is the way I work... Made the last few unfortunately using a cute printed paper I had left over from my daughters advent tree I had made her for a friend's new baby, only made 8 of them last year but one more this year oh well...anyway her are the pictures of the tree cut out in printed paper think it looks adorable no need to decorate. The first ones I made were just the green as Dawn had suggested, did some decorating using  acrylic paint and Stickles in red, this one did not have the white acrylic on it to make it look like snow was on it ...but you get the idea. They were really fun now get to decorate the envelopes so the look just as Christmasy, also need to add a sentiment to inside have to come up with that yet.  Have fun hope you enjoy the cards.

Thursday, August 16, 2012

Baking with Cyn STROMBOLI the easy way

Came home from work the other day you know how that goes husband and I usually play the what do want to eat while I am driving home.  The I do not know what do you want thing some times it drives me crazy and that on most days is a short trip.  Anyway we we talking about making our Stromboli, had made one about a week or so ago and it was the bomb!  In a Good way so good but it could be better, we had in the past used Martha White Pizza crust, it was inexpensive and kept in it bags till we added the liquids, it served it purpose, it worked and we liked it because we had nothing else to compare it to for convenience except getting pizza via a real restaurant or take out.  So one day staring at the biscuit cooler at the store noticed the pizza crust in a can, thought lets give this a shot.  It was a little more expensive but if it worked I was for it, it was Great Value, took it home and then one night we decided to go for it and it was not a bad Stromboli, but we thought we could do better.  So this night in particular, husband decided he wanted another one of those sorry Stromboli's we had made a week ago.  (sorry in our house is a relative term it could be bad or jokingly good) I knew he meant good so we had purchased at the store the last visit a pizza dough in the can by Pillsbury a little more expensive by about $1.00 but GV was not to be seen think Walmart is either getting new designs for their stuff or doing away, this is another story.  So get the new improved Pillsbury pizza crust out and fill the cookie sheet all 9 x 13 worth of it after cooking our Italian sausage onions, garlic and mushrooms with oregano in it, threw some mozzarella cheese on first then added the meats and vegetables, then of course more cheese and then into the (all depends on your oven) 400 degree oven for approx. 9 minutes.  We had also light coated the top of the Stromboli with olive oil and garlic powder, no vamps in our house, even though True Blood and debunked the garlic and mirror thing, and they said everything on the internet is true!  Anyway too it out of the oven and sliced it in to sections with my handy dandy pizza cutter and to our surprise it was better by far than the first. 
The recipe so that it is
1 Can of pillsbury pizza crust
2 links of Johnson-ville sweet Italian sausage
1 onion
3 cloves of garlic minced
a good sprinkle of oregano
almost a whole 2 cup bag of mozzarella cheese.
cook all the raw stuff except cheese and crust till done put pizza crust on the cookie sheet oven should be already on 400 degrees.
Sprinkle about half the bag of cheese as a base and then put the other ingredients on top , then add one more layer of cheese (you would not believe we like mozzarella so much) and then fold over the crust to make a pouch or Stromboli what ever you need to explain this pinch the edges and bake.  Did not plain on exploiting my Stromboli so did not take step by step pics (this was a spur of the moment with husbands phone) I am sure we will have it again soon so those of you who need them ( I doubt many of you do but we do have virgins out there ) and they will will post them then.  As you can see a bite or tow was already out of it when realized need to post this wonderful meal on the web. Hope you try it and enjoy it as much as we did. 

Saturday, June 9, 2012

Okay Camisole Wearers unite!! HAHAHAHA

Get it they are united on one hanger...This may not be the most earth shattering thing to come up with but right this sec think it is the bomb, until one of you ladies out there on the web can give me a better Idea I am going to go with this.  I was tired of trying to find a camisole to go with whatever outfit I wanted to wear and was tired of looking for it on the last shirt I wore it with.  So fond these cute shower curtain rings at the thrift store of course and they were so colorful looked like candy drops, thought they would be a great way to hang them some way.  Of course tried them just on a hanger and they all slid to the one end then grabbed this old wooden pants hanger and put all them on it and snapped it shut and it held them in place now it is hanging in my closet all sorted and easier to find than before.....got room for a couple of more should be at least 12 of them there hooks wise not camisoles, going to probably bend them a little more so they will not slip off hanger, but for now they are okay the way they are.  Short an  sweet going to go start re-fashioning some more Hawaiian shirts got today.    This time will try and do a step by step tutorial on another V-neck one, the other was so comfortable that I made last week-end.

Friday, June 1, 2012

Doodle or Zentangle what ever you want to call it


Took a class we called Zentangle/doodling think the Z  name is probably copyrighted and can only be used by an official CTZ teacher. The class was at our local scrapbook shop and had a great time, since then I have spent at least 3 nights or more a week doodling or Z-ing a couple of hours each night. Usually working on an 8x11 pad of paper, using Microns or Faber Castell PITT Artist pens in black all different nibs, working on a ceramics piece was a new challenge.  I have been wanting to do  for awhile seen several pics on of a similar idea of this on a ceramic piece on Pinterest of course. So found this soap dispenser at the Dollar Store it cost a $1.00!! Thought about a plate a bowl and nothing spoke to me as something I really needed, not that I needed the soap dispenser, but it was probably the most useful thing I could think of that the black on white would work well, had seen the white Mustang some guy had done with regular sharpies looked really cool, but  first I did not have 30 thousand to chunk down on a car and did not want to devote 80 hours to drawing on the car.   It took about hour and half,  was trying to think of what to do on it as I went and working on a sealed surface makes the product dry a slow so I thought it really drying quicker than I thought.  It is an oil base pen marker from Sharpie who would have thunk!  So here the piece  both sides excuse the sun spot took it with my cell phone.  The dispenser is completely covered all around except the bottom had fun may do another, but get some colored ones for next adventure.  Think a dash of yellow maybe a sun with flairs coming off of it, boy that opens another can of worms.  Better than fishing!!

Monday, May 28, 2012

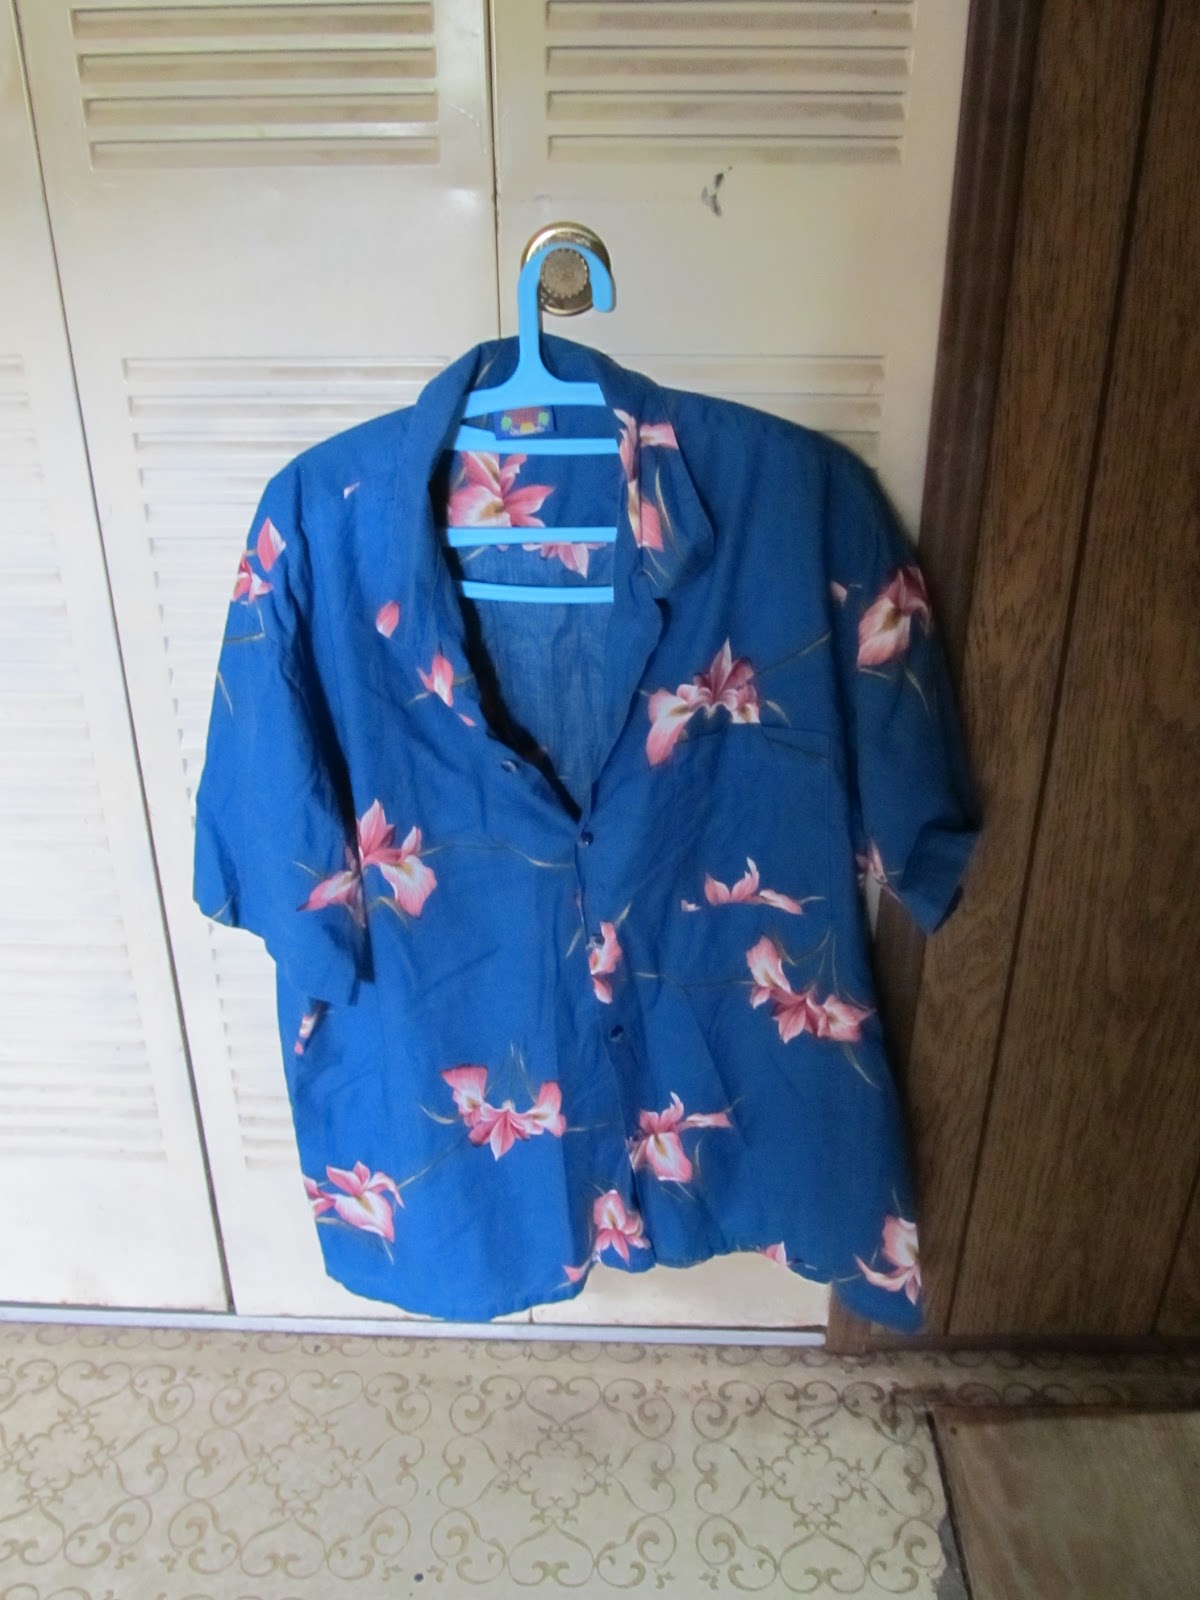
I guess on a blogging roll again, just finished another shirt a few ago, this time re-fashioned Hawaiian shirt.  Hawaiian shirts are sort of a uniform at our office the docs wear them everyday. the owner doc is a big surfer so can see why he wears them reminds him of the smell of surfboard wax, but that is a smell hard to forget especially when he can pretty much hit the surf at least one time a day.  Also got this at my fav thrift store thought it was a little feminine for a guy so grabbed it right up thought it would look good with khaki shorts.  So I went to destructing this garment.  First I cut off the sleeves already had in mind to make it a sleeveless model.  Hemmed the arm holes about 1/4 inch, after trying it on again decided needed to take up the pits a bit, so took about 1 1/2 in from bottom of the opening to the side seem at angle about 4 inches.

Thought about shirring under the bust to make it have a little more shape so put it on a safety pinned it just under the breast and it looked pretty cute but then started thinking where I usually get into trouble it was going to take up too much material and then it would look snug.  So went to plan "B" I made a tuck or pleat under each breast to give more shape but not take up a lot of the material.  After getting that negotiated measured down from center of shoulder about 15 inches approx measurement of safety pin, then over 7 inches from the side seam this made a center point.  From here I drew a straight line across the shirt approx 3 inches long from the center point of that line marked 1 1/2 inches from there left and then right too give me my fold in point, folded it from the  outside edge to the center line going up and down did the same for the other side of this pleat.  Did same measurements for the other side to make a matching pleat.  Pinned both pleats with straight pins then biased the area to get a fit.  Looked pretty good for first go around.  Also stitched the front of the shirt closed the girls have a habit of trying to expand their horizons and would rather they stay supervised.  Just hate it when button shirts gap that has drove me crazy most of my life.  So now it is a very short trip I do not plan to take in near future. Now back to the shirt and leaving mental health to another day....decided it was a bit too long you know how  Stacy and Clinton are always telling you long shirts make you look shorter well took approx 5 inches off split the sides and opened them up then hemmed the whole thing just made it that more comfortable.
Love the pleats short sleeves and so summery looking can't wait to wear it to work tomorrow...cya
Well It has been awhile since my last post was busy with other things than my fun crafts.  Started doing some sewing again picking up ideas on Pinterest.  That place is addicting without a doubt.  Seems like you go there for a second and it ends up an hour or more.  Where did the time go.  Anyway out here on web could not get this new blog set up to work last night so hitting it today.  We just had a "Tropical Storm" blow through here last night only had a good size tree branch hit the ground, go a dead pine in backyard figured some part of it might have fallen, but of course it is still looking like it did before the storm tall and dead.   We got some good winds after midnight and steady rain from about 8:00 pm till this morning about 5:00.  It is sprinkling right now we are sitting at 100% chance of rain (duh) today!!  Big surprise on that guess. 
    Back to why I am out here again, went to a bloggers site called Sugar Bees she does some sewing, recipes,and decorating , she had refashioned a man's tee into a cute shirred side tee. On her site she had a tutorial on how to basically accomplish the look she had so well achieved.   I have a Singer 301 which makes doing some things a little difficult where in this instance since I have never shirred before I was in a new world.  Checked out a few tutorials on how to shirr ( not sure of spelling or if that is a word)  and tried setting my machine as so.  Well it ended up eating my thread causing it to freeze up.  So after an hour of taking a few screws out and getting the thread out of the bobbin I was free (Hahahaha) to sew again.  Ended up taking machine back to the usual settings and put the foot back on put the feed dogs back up.  The shirt I found at my favorite place a big thrift store that runs a 50% off sale on all tags except a particular color that day Saturdays tags were green so of course the really cute stuff was green tagged so you paid for what the tag read.  Any way found this cute tee had this swirly design at neck it was a Columbia tee not super thin material, but liked the color and only paid $2.00 for is so thought what the heck if I mess it up no loss. 


   Got the swirly design drawn on with a pen nothing in my house would show up on it so went to sewing the area with the elastic thread that would eventually be the scrunched up area of interest of this tee.  got it done and also decided needed to take in the sleeves.  They were a little long so decided to shirr them also up one side and down the other, I had become a shirring machine.  Doing the swirly shirring was  a bit of a trick, Mandy said she ended up eye balling it which I also did. just kinda zig ,zagged in swirls and scoops...anyway it turned out kinda neat and I think it works. I am not a spokes model and do not plan to be but hopefully you get the point of the shirt.  should have taken more before and then the after but who knew it was going to work out this good....I may try it again...cya later

Sunday, March 18, 2012

Painting Furniture

Found these two night stands or small dressers whatever you want to call them.  Picked them up at one of our local thrift stores they were in great shape needed a little tlc, loved the hardware.  These are going into a spare room at our office we have students who are about to finish their vet degree ,so they a place to sleep for a couple of weeks while they ride and learn with our vets....anyway I had done the room in a seascape idea the comforter has shells on it the lampshade I covered with a piece of scapbook paper tore it up and modpodged it on.  As far as these pieces painted wiht Behr Premium Plus Gulf Winds which is a light teal color. it has a primer and color in it so no sanding or anything...love that.  I used what I call a drybrush technique where there is paint in the brush but not a lot so that is has a sort of not completely painted  there is some brown showing through in most places.  Think these are going to look great in the room taking them in tomorrow will probably post agains so can get a reaction..sorry for my lack of posting lately been doing all sorts of things beside scrapping and painting.

Saturday, January 21, 2012

Valentines Time!


Was looking for some new Valentines cards for this year, saw a great card on youtube from SprinkleNSparkle.com(removed the link since it must have been taken down but the creator) Valentine card video.  It was a multi-heart folded card, could not find any instructions or a pattern so decided to make my own.  Started out in inkscape first, ended up just opening up SCAL and using the heart shape that was more uniform to make this card.  There is also a cute wonky looking one which I also used.  The printed papers I used were from Kraft Love Words CCP2313, the other 2 were from Jillibean Hearty Barley collection. Quick Cooking Barley and Canola Oil   The hardest thing to get figured out is the opposite side of the half heart, when your using just plain paper there is just stamping to make a different look for the paper but when your setting up the printed stuff then u get that if I turn it over I get the opposite one I need. That did not seem to happen so I guess need to take a step back, since I made so many they sort of ended up working out ...through trial and error.    After getting all the parts glued on I started decorating with gel pens.  I love those things used a black one and my opaque white one to write on the sentiments all over the card just had fun with it.


The link for the SCAL download is here this scal includes and extra heart like on the fronts of these cards on the right , I cut out the double small hearts on the inside needing to put the larger single heart on front.Hopefully you have a s much fun making these as I did.  Can't wait to get them out.

Saturday, December 24, 2011

Found another reason to post


Well got annoyed last night was looking for an svg for a gift card.  So I found a plain one one but that was not what I wanted, of course wanted on with something Christmas theme, nothing elaborate.  So I have been busy today making 3 new gift card holders with snowflakes on them. I have snowflake 1, snowflake 2, and snowflake 3.  I also did photos did not really detail them wanted to get them out here in case someone else was doing a little last minute gifting and had no where to look. Hope these help someone out, will probably be making some for  birthdays shortly since these were easy once I got the main shape down.  Just realized did not take the pictures in order so you can not tell which card is which.  The Green one is flake 2, the red card is flake number 1 so that leaves the blue on which is flake # 3.